
Sign-language interpreting
You do not appear in the participant grid. You appear as a floating, background-removed overlay that each viewer can move, resize and switch on or off for themselves — and nobody sees you at all until you decide to go live.
How it works
Six steps, start to finish:
-
Get your link and set up your space
The host sends you a private link. You need a plain green or blue backdrop behind you.
-
Open the link and join
Your camera is hidden from the grid automatically. Only you can see yourself.
-
Calibrate your chroma key
Remove your backdrop so only you remain.
-
Choose your sign language
This is how viewers find you.
-
Go live
The moment you become visible to everyone.
-
Read the warnings
Five things that will genuinely trip you up if you do not know them.
Your private link
The host sends you a private interpreter link, different from the regular meeting link everyone else uses. It looks like this:
https://acceasy.u-i-x.com/xxx-xxxx-xxx?interpreter_token=eyJhbGciOiJIUzI1...
That ?interpreter_token= part carries your signed
credentials. Open it in the browser you will actually interpret
from.
- No password
- Your link grants direct entry. Even if the meeting has a security PIN, you are never asked for it, and you skip the waiting room.
- Valid ~12 hours
- If your link expires, or the meeting is rescheduled, ask the host to send a fresh one from Share & Interpreter Invites.
- Confidential
- It was issued to you alone. Do not forward it — anyone holding it can join as the interpreter.
- Early arrival
- If you open it before the host starts the meeting, you wait on a branded screen and are admitted automatically. No need to refresh.
Setting up your space
The quality of your overlay is decided here, before any software is involved. Time spent on lighting saves ten times as much time fighting the sliders.
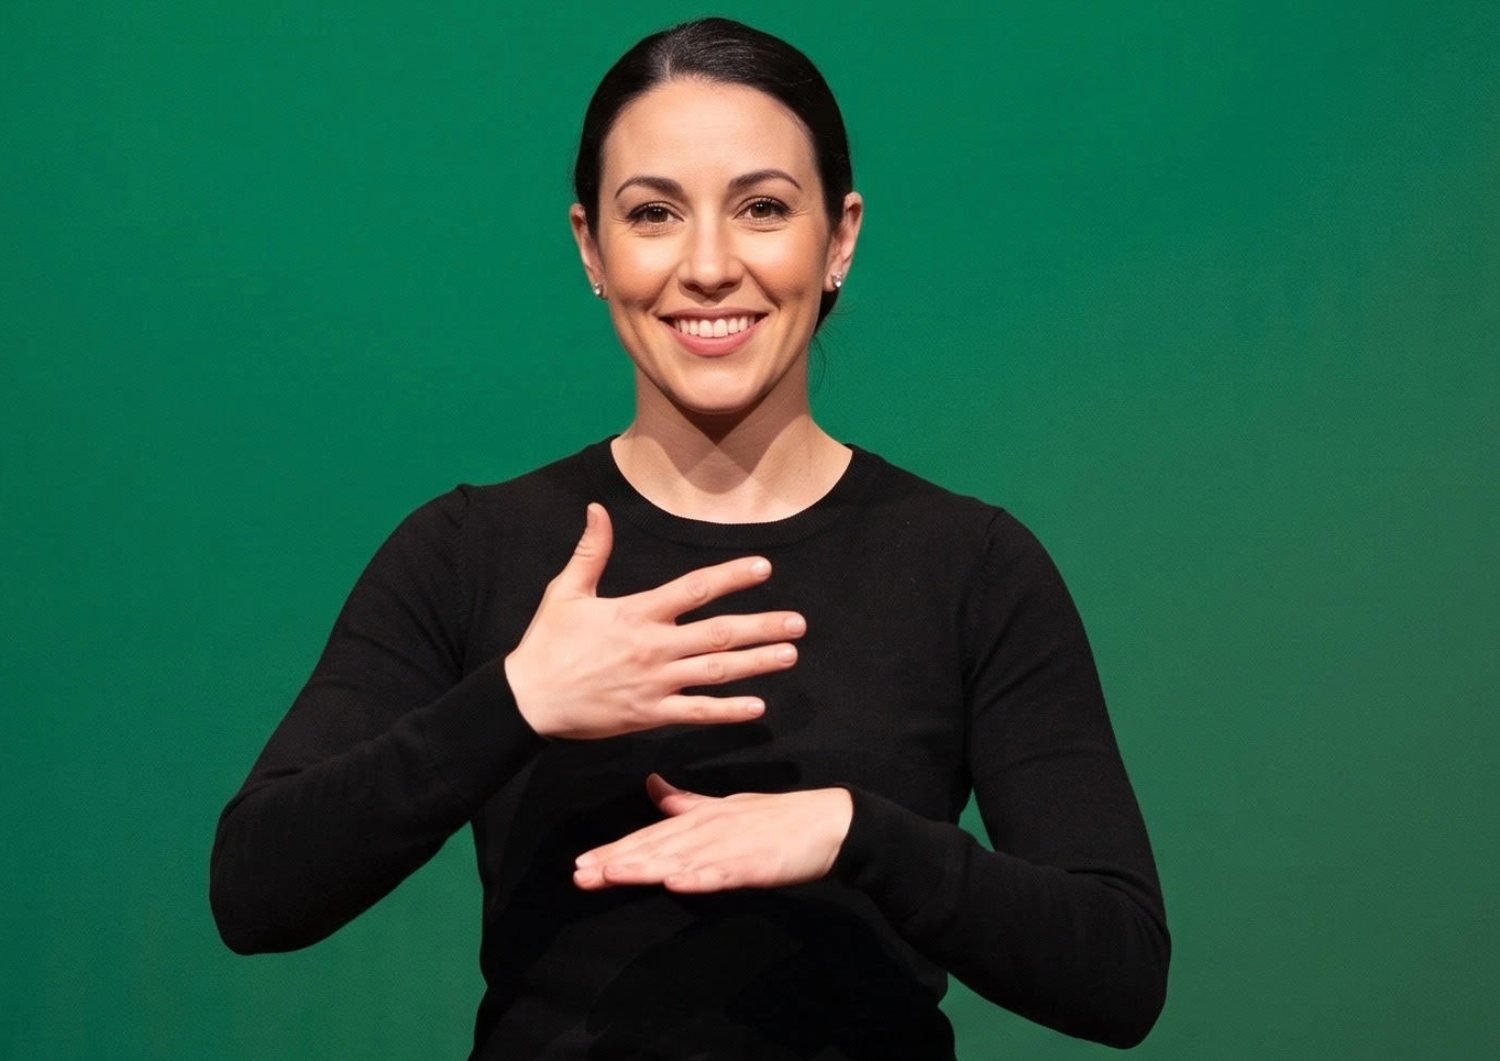
- A green or blue backdrop, lit evenly, with no shadows falling across it.
- Do not wear your backdrop colour. A green top in front of a green screen will be keyed out along with the background, leaving holes where your body should be.
- Frame yourself with room to sign. Head and hands both have to stay in frame — a close-up crops your hands, a wide shot makes you hard to read.
- Light yourself from the front, evenly. Light from behind or the side makes calibration harder and leaves visible edges around your hands.
Joining the meeting
Opening your link takes you to the same pre-join screen everyone else sees — camera preview, name field, device pickers. There is nothing special to fill in: your interpreter status comes entirely from the link, not from anything you type. Click Join.
From that moment your camera is automatically hidden from the participant grid. Nobody sees you in a video tile. You appear only in your own overlay, visible to you alone, so you can calibrate in private.
If you get stuck at “Requesting to join”
In a Restricted meeting your interpreter link may not be enough on its own — you may also need to have been added as a member. Ask the host to add you, or to loosen the room's access level for your session.
Calibrating your chroma key
The CHROMA panel is visible only to you. Viewers never see these controls — only the result.
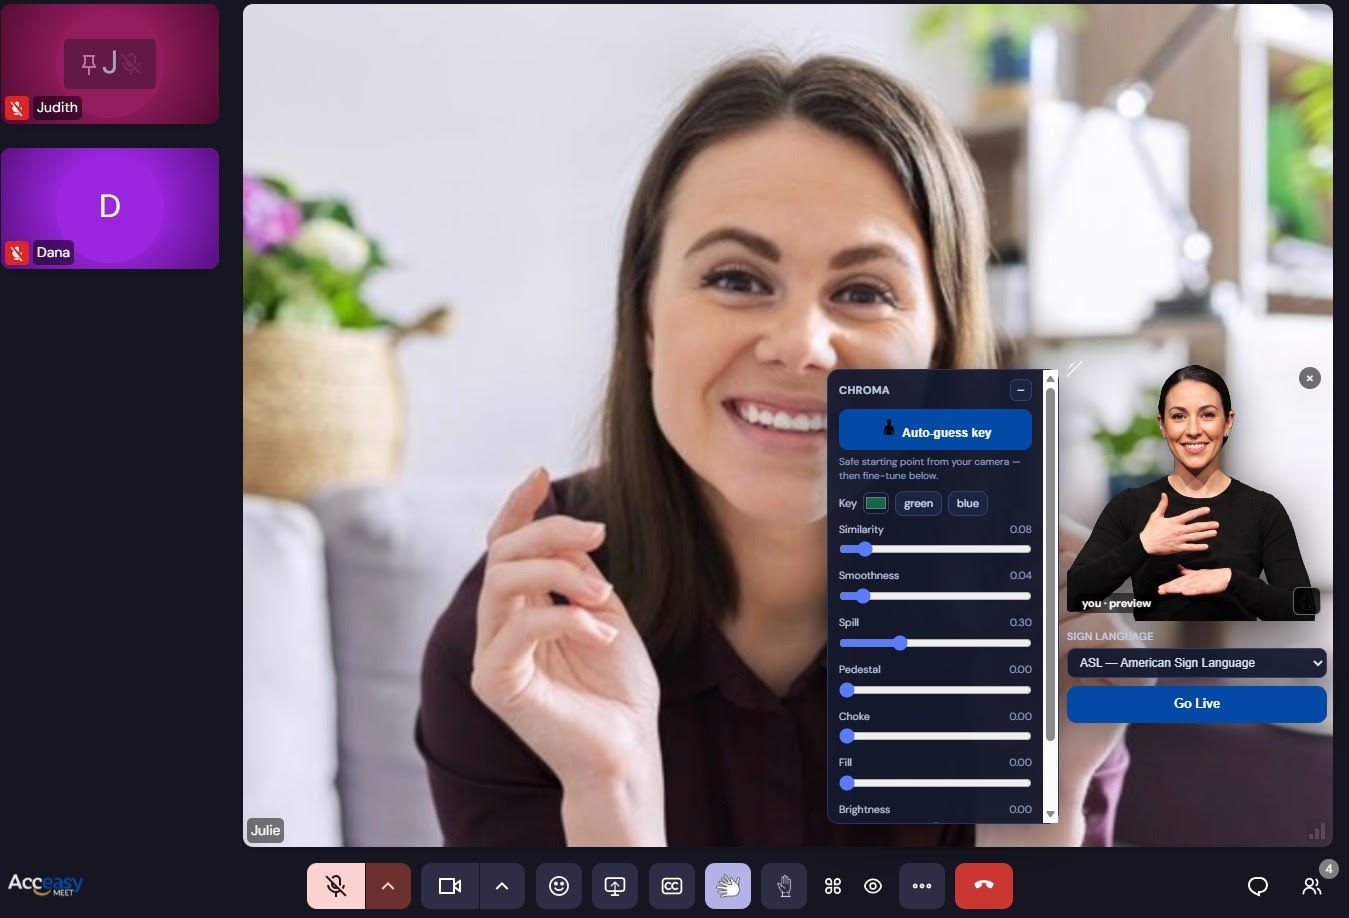
Start with Auto-guess
Tap Auto-guess key. It samples your camera for a moment and sets a sensible starting point — a safe starting point from your camera, then fine-tune below. It works best with a clean, evenly lit backdrop and you roughly centred in frame.
If nothing seems to happen
That usually means it could not get a confident read on your backdrop. Check your lighting and framing and try again. There is currently no error message explaining why — just no visible change.
Set the key colour
A colour swatch with two one-tap presets, green and blue. Match it to your actual backdrop.
What each slider does
Auto-guess gets you close; these get you exact. Rather than describing the mathematics, here is what you would see that should make you reach for each one.
| Slider | Reach for it when you see… |
|---|---|
| Similarity | Backdrop still showing through → increase. Parts of you disappearing — holes in your body, hair or clothing → decrease. |
| Smoothness | A hard, jagged, cut-out-sticker edge around you → increase. Your outline looking blurry or soft → decrease. |
| Spill | Green or blue tint bleeding onto your skin or hair near the edges → increase. |
| Pedestal | A faint ghostly halo or haze around your edges, even where the background is otherwise fully gone → increase. |
| Choke | A thin fringe of leftover backdrop clinging right at your outline → increase slightly. Too much starts eating fine detail like fingers — back off if that happens. |
| Fill | Small holes punched into you — a ring on a shirt, a gap in your hair — from otherwise-good keying being a little too aggressive → increase to patch them back in. |
| Brightness | You are reading as too dark or washed out on camera. |
| Contrast | The image looks flat and grey → increase. Harsh or blown-out → decrease. |
There is no Reset button
If you get lost in the sliders, your only way back to a clean slate is Auto-guess again. It recalculates Similarity, Smoothness and the key colour from scratch, resets Pedestal, Choke and Fill to zero and Spill to a mild default — undoing any fine-tuning on those. Brightness and Contrast are left as you set them.
The panel collapses to a small gear icon if it is in your way; tap that to bring the sliders back.
Choosing your sign language
Above the Go Live button there is a SIGN LANGUAGE dropdown with fifteen options — ASL, LSC, IS and others — plus “Not set”.
This is how viewers find and control you. Everyone watching gets a Language button in their control bar once you go live, and your selection here decides which entry you appear under.
- Pick the language you are actually signing. Viewers use this to decide who to watch when several interpreters are present.
- Relaying with someone in the same language? Select the same language they did. The system treats you as a pair automatically: viewers see one entry rather than two, and do not have to pick between you mid-handover.
- Covering a different language? You each get your own entry, and viewers choose which ones they want to see.
Your choice always wins
The host may already have set a language for you when generating your link. Whatever you select here overrides it, immediately — so if they guessed wrong, or you are filling in for someone else, just pick the right one.
Going live
A full-width button sits below your self-view. Until you press it, nothing you do is visible to anyone else — your calibration, your framing, your test movements are all private. That is deliberate: it gives you space to get things right without an audience.
| State | Button | Your badge |
|---|---|---|
| Private — only you can see yourself | Go Live | you · preview |
| Visible to everyone as a keyed overlay | ● Live — tap to go offline | ● you · LIVE |
Tapping the button again takes you back to private preview, so you can recalibrate or step away without anyone seeing. Going live again is one more tap.
What viewers see
Worth knowing, because people will ask you. Each viewer controls your overlay independently — position, size and backdrop are their choice, not yours, and one person's changes affect nobody else.
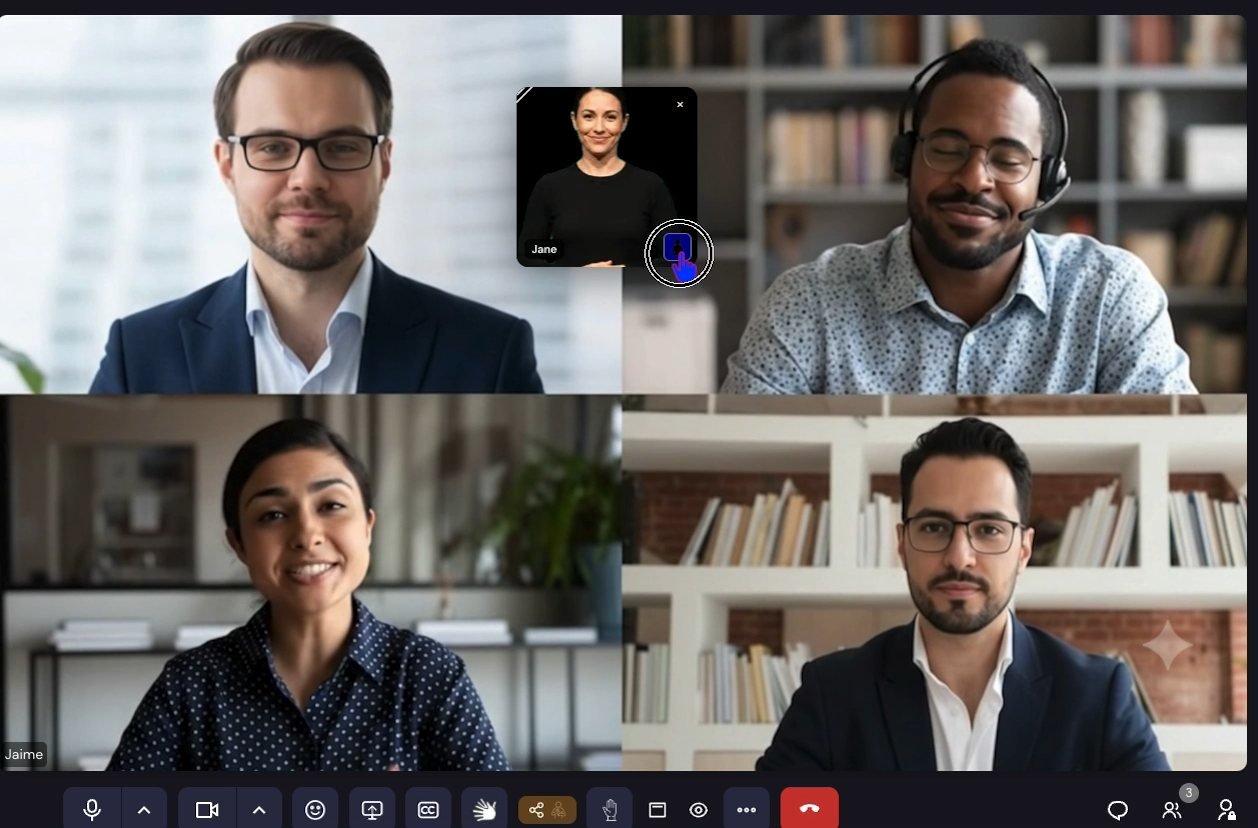
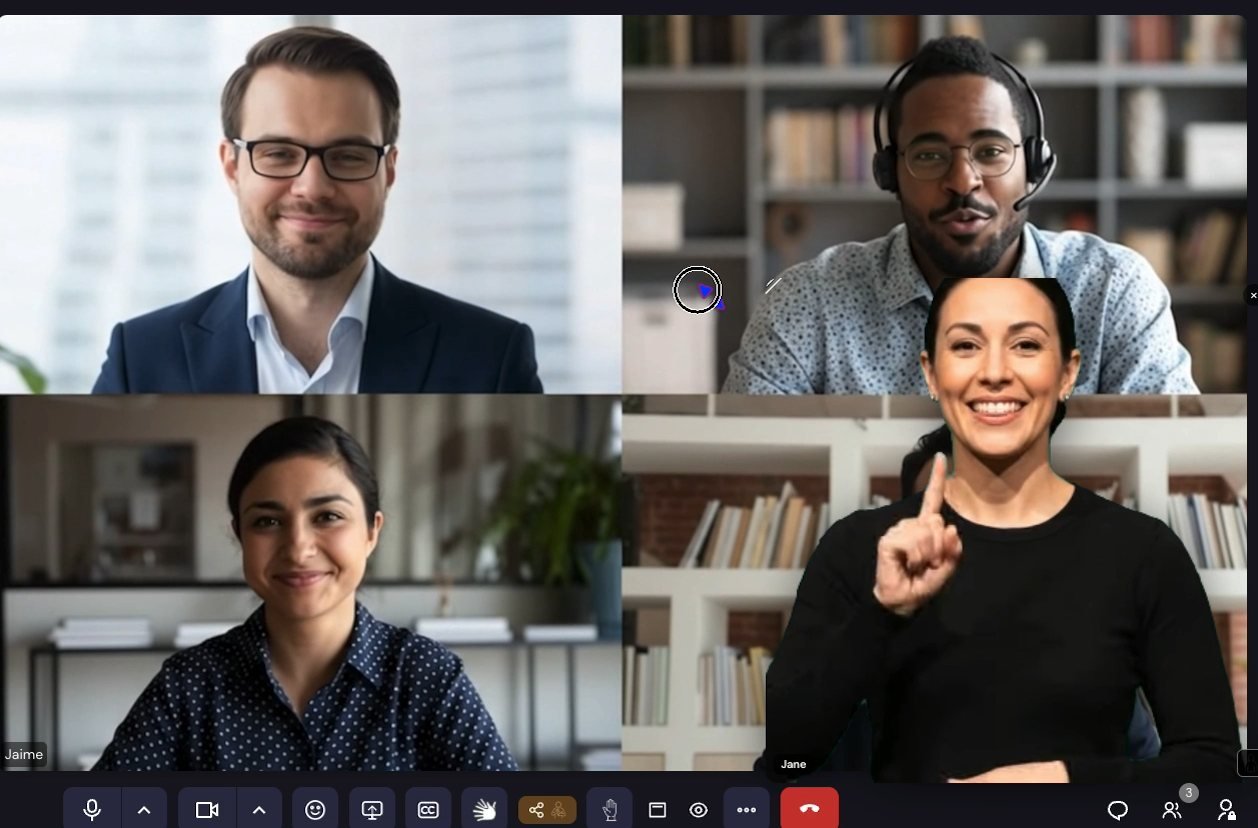
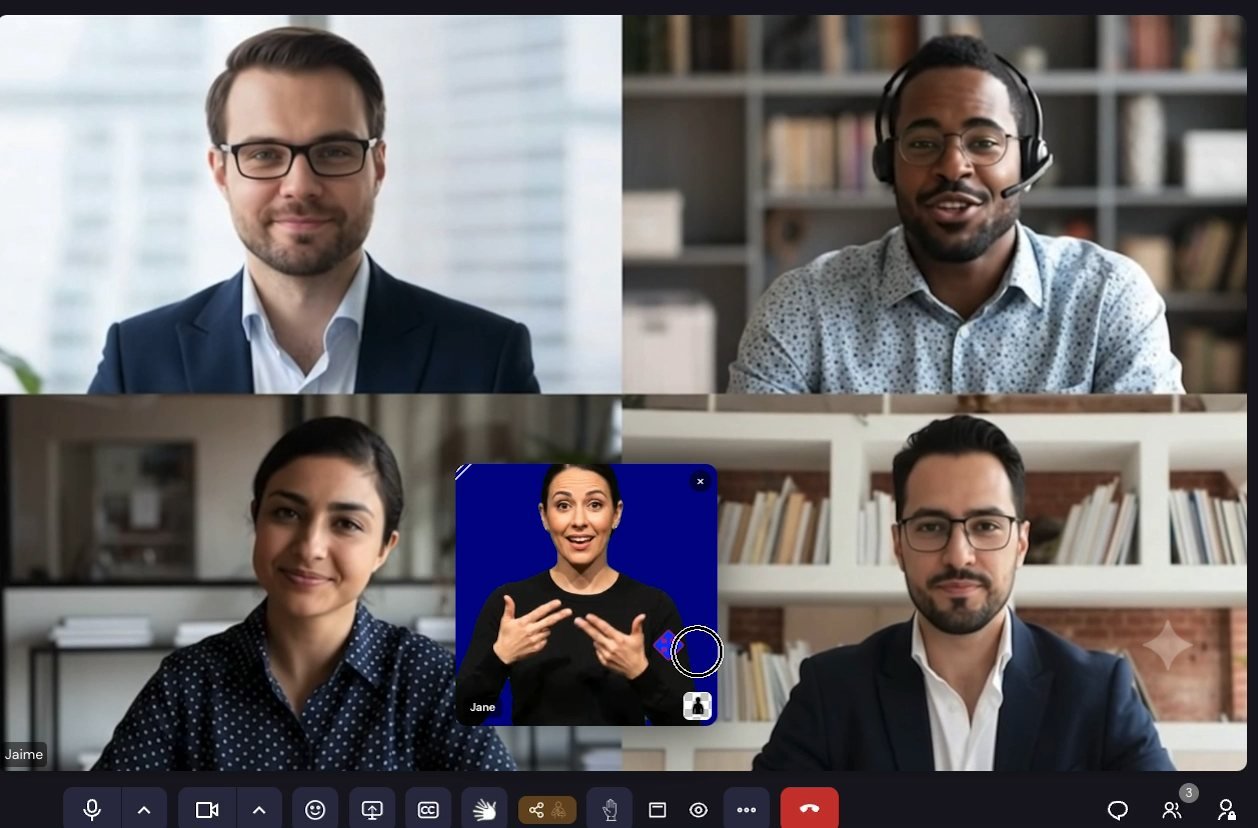
If two of you are relaying in the same language, viewers see a single entry for that language with a small count, not two competing options. If you are covering different languages, each gets its own row and viewers can show both at once.
Before your first session
Five things that will genuinely trip you up if you do not know them going in.
1. Keep your browser window uncovered and in front
This is the single most important habit to build. If your browser window is covered by another window, or the tab loses focus, browsers throttle background activity to save power — and that includes your camera. The video going out to everyone freezes or blanks until your window is back in front. Nobody sees this happen from the outside; they just see you stop moving.
In practice:
- Keep the meeting window on top and uncovered for your whole session. A second monitor dedicated to it is ideal.
- Never minimise it, and never put another app's window on top of it — including your own notes or a chat app.
- Monitor yourself on a second device, such as your phone. Using another window on the same computer risks covering the very window that has to stay uncovered.
This is browser power-saving behaviour, not a fault in Acceasy Meet. No setting fixes it — only the habit.
2. Nothing survives a page reload
A refresh — accidental or deliberate — resets your chroma calibration, your sign-language selection and your live status. You will have to calibrate, reselect and go live again. If you can avoid reloading mid-meeting, do.
3. A new tab needs the link again
Your interpreter link only applies to the tab you opened it in. If you open the meeting in a second tab or a different browser, paste the link there too — otherwise it will not recognise you as the interpreter.
4. If the meeting is ever recorded, you are captured unkeyed
Recording is switched off on this installation. But where it is enabled, recordings capture you on your raw backdrop — not composited the way live viewers see you. Worth knowing if you or the host plan to reuse a recording afterwards.
5. Watch for the connection warning under your video
Your video goes out to everyone over your own upload connection, and signing needs far more of it than an ordinary video call. When that connection struggles, viewers see it first: your video turns blurry, freezes or skips — while on your side everything looks fine.
So Acceasy Meet watches your upload for you. When something is wrong, a small coloured bar appears just below your own video, never over your signing space. It shows while you are calibrating as well as when you are live, and it disappears by itself once things recover.
- Amber — "Your connection is weakening — video quality is dropping": act now, before it gets worse.
- Red — "Your connection is poor — viewers are seeing frozen or blurry video": viewers are already affected.
- "Your computer is too busy to encode video smoothly": the problem is your computer, not your internet.
Hover over the bar to see the numbers behind it — how much you are sending, the size of the picture actually going out, and packet loss. Useful if you need to report it to the host or your IT team.
What to do:
- Get a steadier connection. Move closer to your Wi-Fi router, or better, plug in a network cable. If the office Wi-Fi is the problem, a phone hotspot is often steadier.
- Ask others on the same network to pause big uploads or downloads — cloud backups, large file transfers, other video calls.
- If it says your computer is busy, close the apps and browser tabs you do not need, and plug your laptop into power.
The best time to fix this is before you go live: if the bar shows while you are calibrating, sort out your connection first.